 Favicon is an icon file, which reflects the look and feel of a web site that allows the webmaster to further promote their site by creating a more customized appearance within the visitor's browser.
 Here's an easy way to create a favicon for your site or blog. For favicon, a 16x16 pixel image with 256 color icon is desired. You can create any icon with IcoFX, a freeware icon editor. It is an all-in-one solution for icon creation, extraction and editing. It is designed to work with Windows XP and Windows Vista icons supporting transparency. You can convert your favorite images into icons, or icons into images.
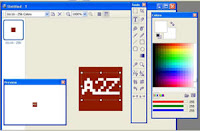
Creating a favicon- Download the IcoFx icon editor, after installation open it and select ‘new’ from ‘file’ menu. In the dialogue box ‘new image’, select 256 color and 16x16 size. Now you can create your own icon from the tool menu according to your taste and choice and save it as ico file. To import an image for your icon, from the ‘file menu’ select ‘import image’ (remember that you need to crop or reduce the image size to 16x16 for better accuracy), and edit or save it as .ico file.
To put it in your blog/site just upload the icon file to ‘Google pages’ (every one can create Google pages with a Gmail account) or any other and note down the URL of the icon file.
<head> and </head>
<link rel="icon" href="http://path of icon file" type="image/x-icon />
<link rel="shortcut icon" href="http://path of icon file" type="image/x-icon" />
For Example
<link rel="icon" href="http://your name.googlepages.com/icon file.ico" type="image/x-icon />
<link rel="shortcut icon" href="http://your name.googlepages.com/icon file.ico" type="image/x-icon" />
No comments:
Post a Comment